ARM

Finding the perfect ancillary travel device

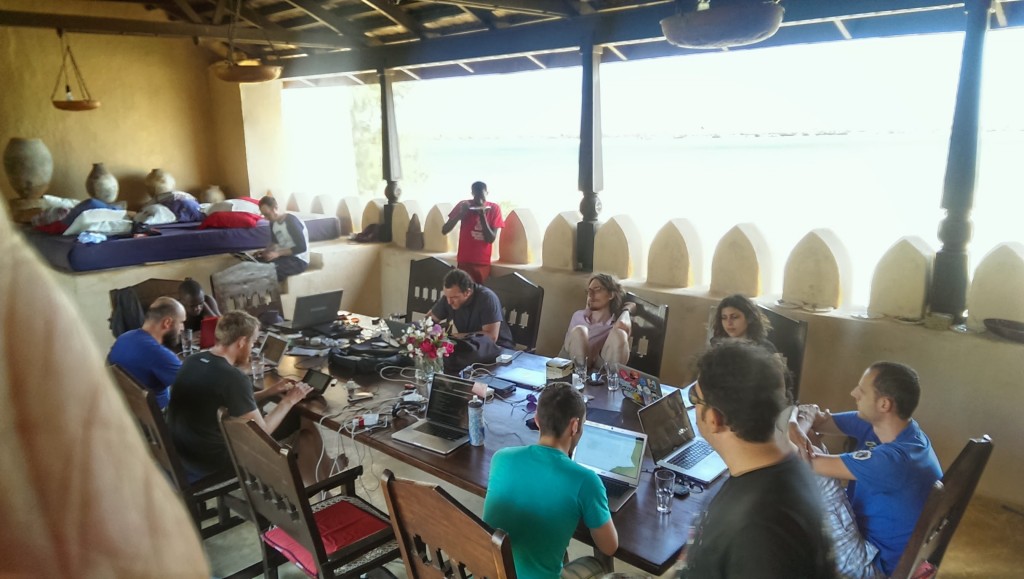
Hackerbeach attendees at the upper dining table

As would be familiar to anybody who knows me, I’m always interested in new tech, especially when it’s running free software and portable enough to be in my every-day carry arsenal.

For the past month or so I’ve been looking at a few devices as a secondary to my laptop to carry with me. In a few weeks I’ll be joining those already there at third installment of Hackerbeach, on the Caribbean island of Dominica.

Sharp Netwalker Ubuntu Lucid Image

I wanted a recent Ubuntu distribution though, which I couldn’t find provided for me online. So I rolled my own, and am reasonably pleased with the results. All of the hardware works, although there are some annoyances, such as no battery meter in the GNOME notification area, and the wireless card isn’t supported by NetworkManager, although still works with iwconfig and wpasupplicant. Additionally, the hotkeys on the top are not bound to any programs.

Upgrading GuruPlug Kernels

After a failed flashing attempt(don’t attempt to tftp flash u-boot.kwb from within U-Boot!) I needed to use JTAG combined with the included JTAG adapter.  To do this, make sure that the UART cable is unplugged, and the JTAG cable is plugged in(unplug/replug the USB adapter just to be safe). First grab the guruplug-installer package, then grab a known-good copy of U-Boot.

$ cd Downloads/
$ tar zxvf Guruplug-installer.tar.gz
$ cd guruplug-installer
$ sudo ./runme.sh ../uboot.guruplug.bin
(lots of scrolling text)

At this point U-Boot is restored, and all that’s needed is to upload a new kernel(and maybe rootfs). Your old kernel won’t work with this new version of U-Boot, so make sure that you have a kernel compiled and ready to use. If you don’t feel like patching(and manually fixing the failed patches) I’ve provided a 2.6.34 kernel for you, complete with modules. To upload the new kernel you’re going to need to attach your GuruPlug to your network with it’s top-facing ethernet interface(near eSATA port).
Restoring GuruPlugs

At which point I decided I wanted to try to restore the original kernel, so that I would at least have a working system with which to test.  Therein lied the rub.  The files posted here are completely broken.

Thankfully, a friend of mine also ordered a GuruPlug.  So I grabbed his images. Here’s how to ACTUALLY restore your GuruPlug if you flash a bad kernel to it.

Download the extracted uImage.  This was created by the command ‘dd if=/dev/mtdblock1 of=uImage’.

AlwaysInnovating Touchbook Photo Gallery

So far build quality seems good, and it’s battery life is working as advertised(although I haven’t had it for long enough to do a completely battery drain test.  It comes with a stylus and 3 magnets for attaching to a refrigerator.  The magnets are TOUGH to pull apart.  I’d recommend using a butter knife or box cutter to wedge between them.  According to my Kill-A-Watt, the entire laptop uses 14 watts with the backlight on and battery charging.  With the base disconnected, the entire laptop uses 8 watts charging!  That’s significantly below all of the Atom, and even Ultra-Low-Voltage Core 2 stuff I’ve seen.  I’d estimate that the laptop would draw 4-6 watts without charging.