Hardware

Finding the perfect ancillary travel device

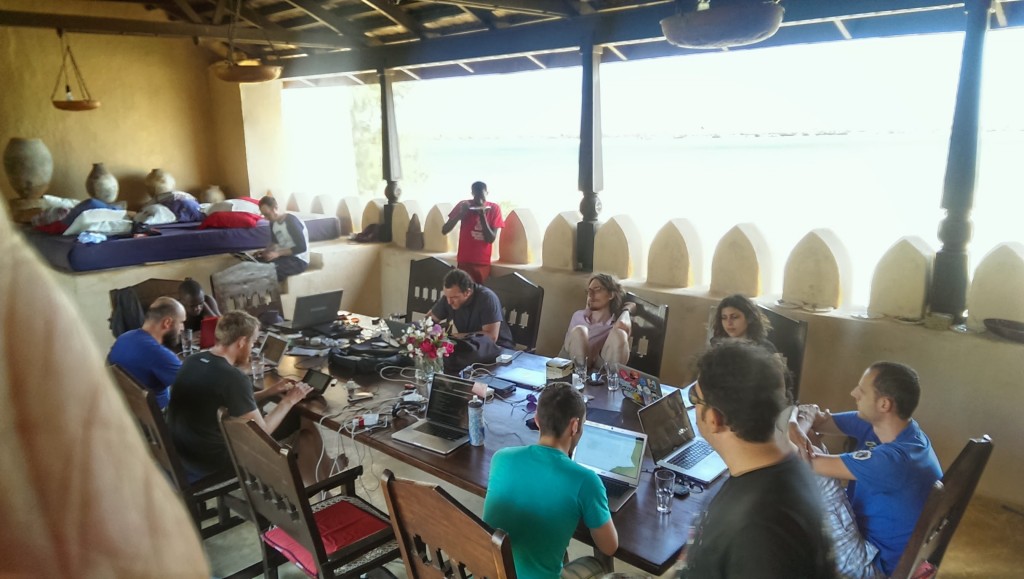
Hackerbeach attendees at the upper dining table

As would be familiar to anybody who knows me, I’m always interested in new tech, especially when it’s running free software and portable enough to be in my every-day carry arsenal.

For the past month or so I’ve been looking at a few devices as a secondary to my laptop to carry with me. In a few weeks I’ll be joining those already there at third installment of Hackerbeach, on the Caribbean island of Dominica.

Upgrading GuruPlug Kernels

After a failed flashing attempt(don’t attempt to tftp flash u-boot.kwb from within U-Boot!) I needed to use JTAG combined with the included JTAG adapter.  To do this, make sure that the UART cable is unplugged, and the JTAG cable is plugged in(unplug/replug the USB adapter just to be safe). First grab the guruplug-installer package, then grab a known-good copy of U-Boot.

$ cd Downloads/
$ tar zxvf Guruplug-installer.tar.gz
$ cd guruplug-installer
$ sudo ./runme.sh ../uboot.guruplug.bin
(lots of scrolling text)

At this point U-Boot is restored, and all that’s needed is to upload a new kernel(and maybe rootfs). Your old kernel won’t work with this new version of U-Boot, so make sure that you have a kernel compiled and ready to use. If you don’t feel like patching(and manually fixing the failed patches) I’ve provided a 2.6.34 kernel for you, complete with modules. To upload the new kernel you’re going to need to attach your GuruPlug to your network with it’s top-facing ethernet interface(near eSATA port).
Defcon Badge Hackery

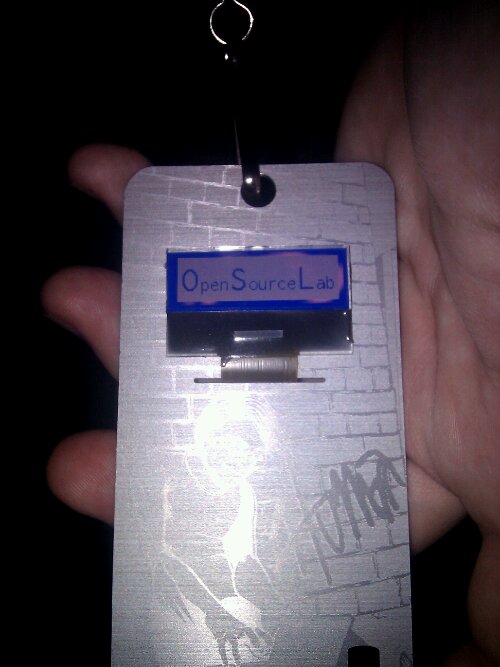
Photo

Some of the OSUOSL employees attended the recent DefCon 18 conference.  One of the more uncommon features was the conference badge.

In addition to being a ticket for entry into the conference,  it’s also a hackable piece of hardware complete with 128×32 LCD screen, and microprocessor.  The source code for the badge is available online.

Corbin Simpson, a developer at the OSU Open Source Lab spent a large portion of his time at the conference developing and uploading new software onto his badge.  His first badge hacking project was to upload new images to show his appreciation for the lab.

Restoring GuruPlugs

At which point I decided I wanted to try to restore the original kernel, so that I would at least have a working system with which to test.  Therein lied the rub.  The files posted here are completely broken.

Thankfully, a friend of mine also ordered a GuruPlug.  So I grabbed his images. Here’s how to ACTUALLY restore your GuruPlug if you flash a bad kernel to it.

Download the extracted uImage.  This was created by the command ‘dd if=/dev/mtdblock1 of=uImage’.

RouterStation Pro OpenWRT upgrade

The RouterStation Pro comes preloaded with a relatively old installation of OpenWRT Kamikaze.  Being a sucker for bleeding-edge software, I definitely wanted to check out code from the main Subversion repository to get it up-to-date as far as development goes.  Here’s how I did it.

bkero@ponderosa ~ $ svn co svn://svn.openwrt.org/openwrt/branches/backfire
bkero@ponderosa ~ $ cd backfire
bkero@ponderosa ~/backfire $ make menuconfig

Now you select some options to specify that we are building an OpenWRT image for a RouterStation Pro:

My cheap gaming rig

I’ve been to several LAN parties recently, and have been getting a very accurate understanding of how much a pain it is to lug around a 30lb case, 30 inch monitor, and all the accessories.  I’ve looked at gaming laptops;  they all seem too expensive, too expensive, and too slow compared to something I could build myself, for cheap.

The total cost for the project needed to be under $80.  I already have a good gaming rig, and the convenience of such a thing is only good if the cost is low.

Accelero S2 Installation on nVidia 8800GT

In an effort to modernise my gaming rig, I purchased a second nVidia 8800GT to compliment my first.  Benchmarks and reviews indicate that this setup yields comparable performance to many of today’s more expensive offerings.  This is a log of the installation and testing of the cards.

The Accelero S2 is an aftermarket heatsink used to provide additional cooling to video cards.  Although it was originally intended for lower-end cards, the greater surface area is able to cool an nVidia 8800GT adequately.  It has 2 heat pipes routed through the base of the sink and bend into a U-shape, protruding through a massive array of fins.  The kit also includes 8 RAM sinks.  This is enough for the RAM modules, although you’re on your own for cooling the voltage regulation sections of the card.  The Accelero S1 heatsink is physically larger than the S2, and includes additional heatsinks for cooling the FETs.  Luckily, I had spare Swiftech MCP15 heat sinks available from a previous project.  3 additional sinks per card were needed.

Gentoo on the Fujitsu P1620

Kernel

Support is in the mainline kernel except for:

  • Fingerprint reader
  • Touchscreen
  • Panel buttons

Wireless

It’s an Atheros 5008 card, supported fully by the ath5k driver.  Early driver versions in old kernels such as 2.6.30 have very shaky hardware support, therefore unless you’re running the latest available code, I would recommend swapping it out.  I’ve removed the integrated wireless card in favour of an Intel 5350AGN, which has been working well in the laptop. It draws a bit more power, but gives me WiMax support(another big kernel/userland headache), and dual band 802.11n.